
PED4-IPA10 Instructions
Sizing your PED4 IPA10 to your iPad Air:
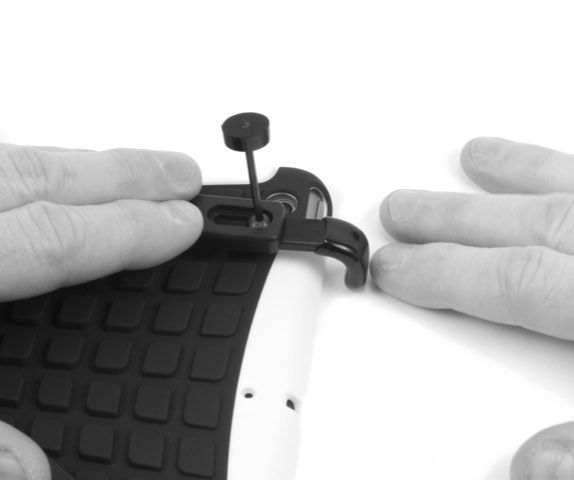
Lay your cased or bare iPad Air face down on a table. Using the supplied 5/64" wrench (torque limiting), loosen all 6 screws just enough so that the fingers slide. Place the IPA10 holder over the backside of the iPad Air. Equally slide the 6 fingers until they firmly touch the device, then with light finger torque tighten the 6 screws in place. After complete stand assembly, you may want to adjust a slide finger or two (or all) for your desired fit.
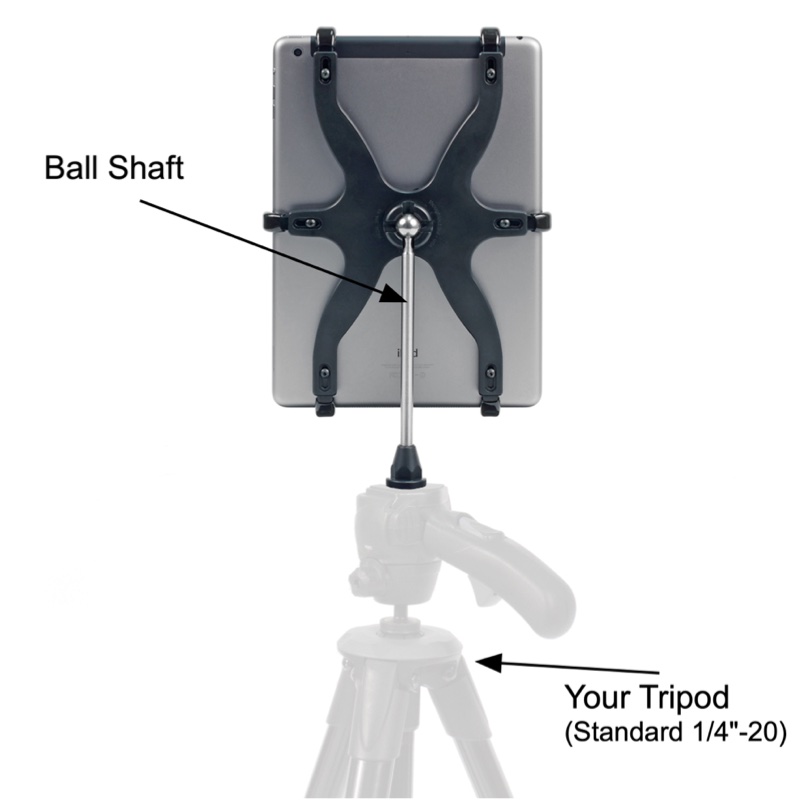
Attaching the Ball Shaft to your tripod:
After hand tightening the ball shaft to your tripod, use any 11/16" open end or adjustable wrench and turn 1/64" MAX. Caution: Do not over tighten.
Your tripod may require another tool or coin to tighten the thread. To disassemble, do the reverse procedure.
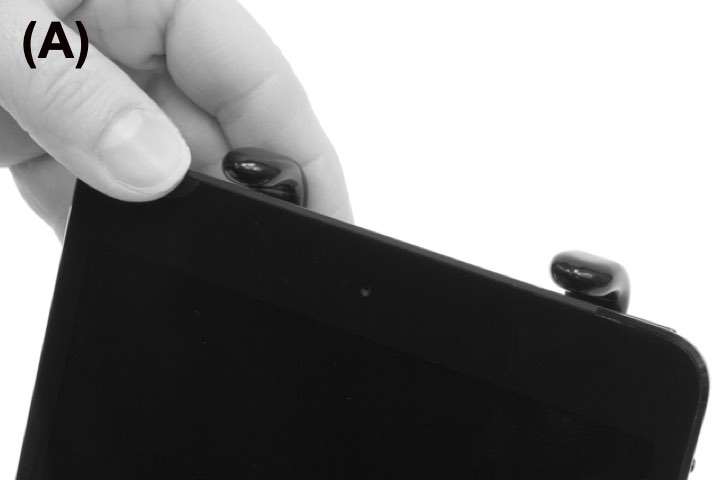
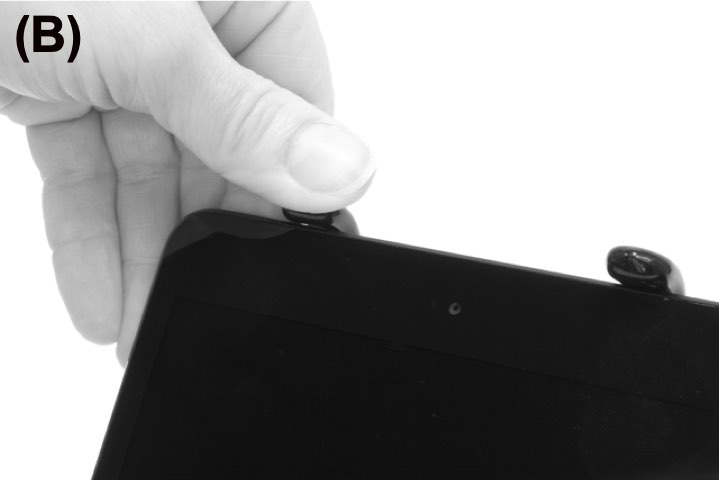
Inserting and Removal of the Device:
(A) Place your device into the bottom slide finger(s) of the holder and push the top of device into place.
(B) To remove the device, simply push up and back on the top slide fingers and remove the device in reverse.
Ball Socket - Future Procedure:
Overtime you may experience the ball socket does not have the holding power it had when it was new. Using the supplied 3/32" wrench, turn the recessed screw counter clockwise one half turn. Then slowly turn the wrench clockwise until you feel the screw contact the steel ball. Once contact is made, approximately another 1/4 turn is all that is needed.

Care Instructions:
Do not store outside
Not for extended outdoor use
Water resistant, not water proof
Dry it off if it gets wet
*Potential failure may result by not properly using the supplied torque limiting wrench and/or by over-tightening. The torque limiting wrench must be used with your fingers only.
The PED4-IPA10 is custom built by Thought Out Company - we can custom build virtually anything at your request.
To see, learn more, or to purchase the PED4-IPA10
If you have any questions, please let us know
You may also like these products